
Do you want to wire in ceiling speakers? It’s not as difficult as you may think. With a little time and effort, you can have ceiling speakers that will provide great sound quality for your home theater or music system.
Here are some tips on how to wire in ceiling speakers.
- Choose the location for your ceiling speakers
- Cut holes in the ceiling at the chosen locations using a drywall saw
- Feed speaker wire through the holes to the speaker location
- Connect the speaker wire to the terminals on your ceiling speakers
- 5) Mount your ceiling speakers in the holes using screws or other fasteners appropriate for your particular model of speaker
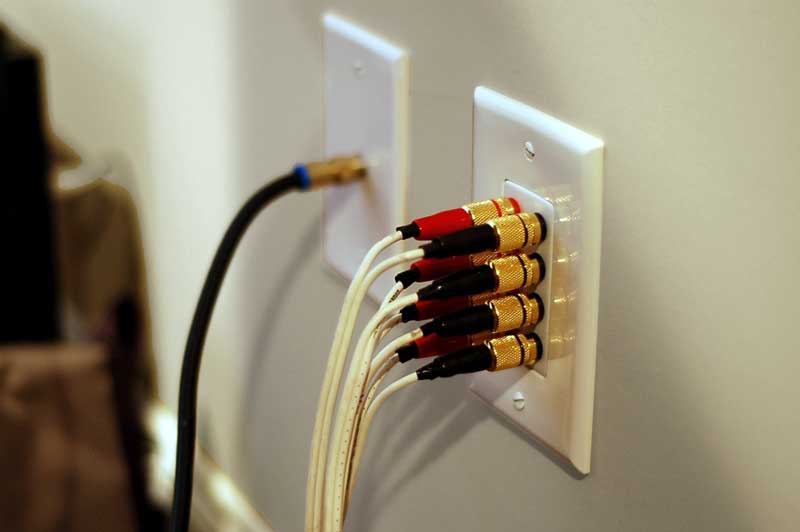
Credit: avgadgets.com
How are In-Ceiling Speakers Wired?
In-ceiling speakers are a great way to add audio to any room without taking up valuable space. But before you can enjoy the sweet sounds of your new speakers, you need to wire them up correctly. Let’s take a look at how in-ceiling speakers are wired and what you need to do to get them connected properly.
The first thing you need to do is identify the positive and negative terminals on your speaker. The positive terminal is typically marked with a red or plus sign, while the negative terminal is usually marked with a black or minus sign. Once you have the terminals identified, it’s time to connect the wires.
If your speaker came with its own wiring harness, simply connect the positive wire from the harness to the positive terminal on the speaker, and then connect the negative wire from the harness to the negative terminal on the speaker. If your speaker did not come with a wiring harness, you will need to use bare speaker wire. First, strip about ½ inch of insulation off of each end of your wire using a wire stripper tool.
Then, twist each exposed end of wire around its corresponding terminal (positive to positive, negative to negative) and tighten down each connection securely using a Phillips head screwdriver.
Once all of your connections are secure, simply tuck your wires away so they’re not visible and enjoy your new in-ceiling speakers!
Why Do Ceiling Speakers Have 4 Wires?
Most ceiling speakers have four wires because they are designed to be used with a surround sound system. The four wires are used to connect the speaker to the receiver or amplifier. The four wires carry the audio signal from the receiver or amplifier to the speaker.
The speaker then converts the electrical signal into sound waves.
What Do I Need to Hook Up Ceiling Speakers?
If you’re looking to add some new life to your home audio setup, ceiling speakers are a great option. But before you start shopping, it’s important to know what you need in order to hook them up properly. Here’s a quick rundown of the basics:
First, you’ll need an amplifier or receiver that can power ceiling speakers. If you don’t already have one, this will be your most significant purchase. Look for an amp with enough watts per channel to match the sensitivity rating of your chosen speakers.
Next, you’ll need speaker wire to connect the amp to the speakers. Be sure to get wire that is thick enough gauge to handle the amperage draw of your system; 18-gauge is a good starting point. Most importantly, make sure the wire is rated for in-wall use – regular speaker wire isn’t safe for running through walls and ceilings.
Finally, you’ll need some way to mount the speakers in your ceiling. If they’re going into existing light fixtures, there may be mounts available specifically for that application. Otherwise, look for universal mounts that will work with most any speaker size and shape.
With everything in place, simply connect the wires and fire up your music!
How Do I Hook Up Wired Ceiling Speakers to My Tv?
If you’re looking to add some audio to your television viewing experience, you may be wondering how to hook up wired ceiling speakers. While there are a number of ways to do this, we’ll walk you through one option that will provide great sound without breaking the bank.
Before we get started, it’s important to note that not all TVs have an audio output that can be used for connecting external speakers.
If your TV doesn’t have this feature, you’ll need to purchase an amplifier or receiver that has an input for connecting a TV. You can then connect your ceiling speakers to this amplifier/receiver using speaker wire.
Now, let’s take a look at how to connect wired ceiling speakers to a TV with an audio output:
1. Begin by running the speaker wire from your ceiling speakers to the location of your TV. Make sure there is enough slack in the wire so that you can easily access the audio output on the back of your TV.
2. Once you’ve located the audio output on your TV, use a pair of pliers or scissors to carefully remove the plastic cover (this will expose the metal prongs).
3. Take one end of the speaker wire and insert it into one of the holes next to the exposed metal prongs (it doesn’t matter which hole you use). Then, use your pliers or scissors to twist the wires together until they’re securely fastened. Repeat this step for the other side of the speaker wire/connection.
4. Now, gently push each end of the speaker wire into its respective hole next to the exposed metal prongs on both sides ofthe connection (one side will be labeled “positive” andthe other “negative”). Make sure that each side is inserted firmly into its hole – if it’s not pushed in allthe way,you may hear static when playing audio throughyour new system!
I should have hired a professional… DIY in-ceiling speaker install
How to Connect Ceiling Speakers to Receiver
Are you looking to add some great sound to your home theater or living room, but don’t want to go through the hassle of installing floor speakers? Then ceiling speakers may be the way to go! In this article, we’ll show you how to connect ceiling speakers to a receiver so you can start enjoying your music or movies in no time.
First things first, you’ll need to purchase some good quality ceiling speakers and a receiver that is compatible with them. We recommend checking out Polk Audio or Boston Acoustics for some great options.
Once you have your equipment, it’s time to get started!
The first step is connecting the positive and negative wires from your speaker to the corresponding terminals on your receiver. If you’re not sure which wire is which, consult your owner’s manual for assistance.
After the wires are connected, screw the speaker into its bracket or mount.
Make sure it’s secure before proceeding to the next step.
Now it’s time to test things out! Turn on your receiver and tune it to an empty station.
Slowly turn up the volume until you can hear a faint humming noise coming from the ceiling speaker(s). If everything sounds good, congratulations – you did it!
Conclusion
If you’re looking to add some background music to your home or office, ceiling speakers are a great option. They’re relatively easy to install, and they don’t take up any floor space. In this blog post, we’ll show you how to wire in ceiling speakers so you can enjoy your tunes in no time.
First, you’ll need to find a suitable location for the speakers. If possible, try to avoid placing them directly above electrical wires or other potential sources of interference. Once you’ve found a good spot, use a stud finder to mark where the speaker will be mounted.
Next, drill a hole through the ceiling at each mark and run the speaker wire through. If you’re using multiple speakers, make sure each one has its own dedicated wire. Once the wires are in place, connect them to the terminals on the back of the speaker and secure the speaker in place with screws or drywall anchors.
Finally, turn on your receiver or amplifier and test out your new ceiling speakers! With just a little bit of work, you can enjoy great sound without sacrificing any floor space.