
If you have a receiver and passive speakers, you’ll need to connect the two using speaker wire. It’s important to use the correct gauge (thickness) of wire for your system. The lower the gauge number, the thicker the wire.
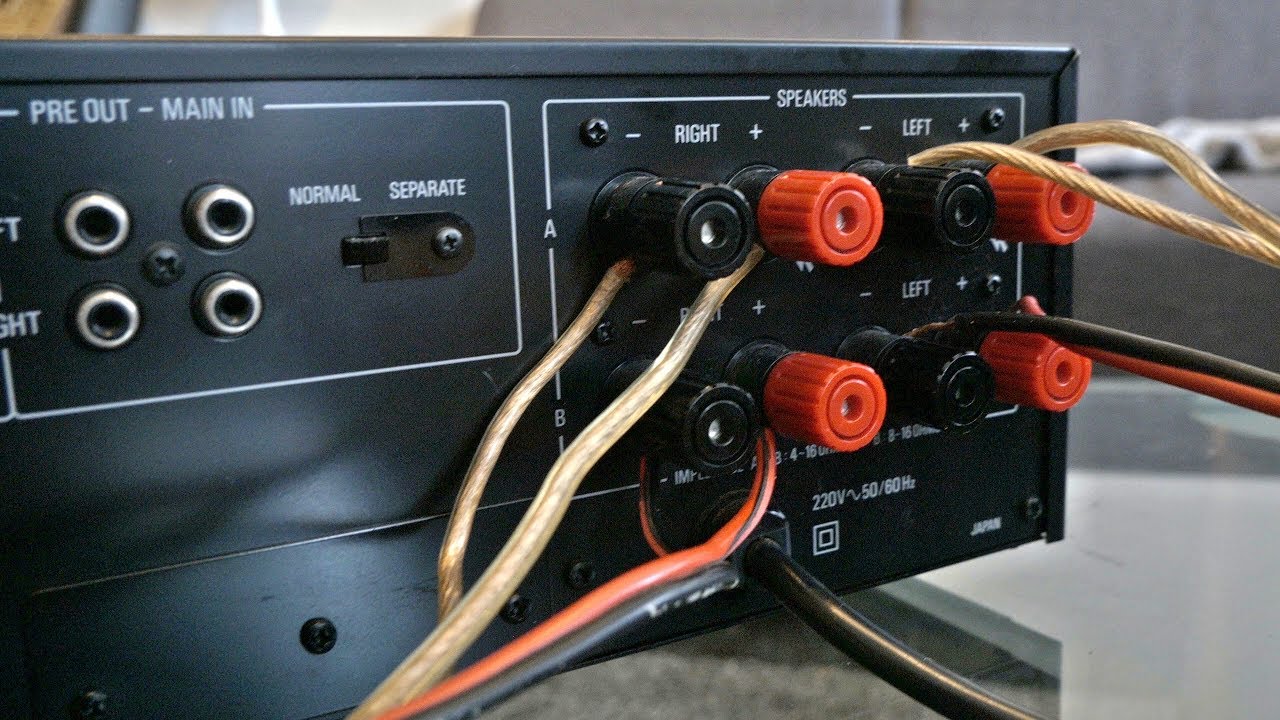
Most receivers will have clear labeling on the back as to which wires are used for which channels. If not, it will be clearly marked in your receiver’s manual. Once you’ve determined which wires go where, simply insert them into the corresponding terminals on both the receiver and speakers.
If your receiver has binding posts, twist each knob clockwise until it’s snug against the wire but taking care not to overtighten and damage the post. With spring clips or banana plugs, insert each plug into its slot until it clicks securely into place.
- Locate the audio output jacks on your receiver
- These are typically located on the back of the receiver and will be labeled “Audio Out” or “Speaker Out
- Connect one end of your speaker wire to the audio output jack on your receiver
- Connect the other end of the speaker wire to the input terminals on your speakers
- The positive (red) terminal should be connected to the positive terminal on your speaker, and the negative (black) terminal should be connected to the negative terminal on your speaker
- Once all connections have been made, turn on your receiver and test your speakers to make sure they are working properly
How to Connect Speakers to Amplifiers | Home Audio Basics
How to Hook Up Speakers to a Kenwood Receiver
Kenwood is a Japanese electronics company that produces a wide range of audio and video equipment. Their receivers are popular among audiophiles and home theater enthusiasts alike. If you’re looking to add some great sound to your home theater setup, you may be wondering how to hook up speakers to a Kenwood receiver.
There are a few things you’ll need to know before getting started. First, make sure that your receiver has enough power to drive the speakers you’re using. You can find this information in the specifications for your particular model of receiver.
Second, determine what type of speaker wire you’ll need. The most common types are banana plugs, spade lugs, and bare wire.
Once you have all the necessary supplies, follow these simple steps:
1) Connect the positive (red) speaker wire from your left front speaker to the positive binding post on your Kenwood receiver marked “LF.” Repeat this step for the right front speaker, connecting the positive (red) speaker wire to the binding post marked “RF.”
2) Next, connect the negative (black) speaker wires from both front speakers to the negative binding posts on your receiver labeled “GND” or “Ground.”
3) Now it’s time to connect your surround sound speakers. For surround sound systems with five or more speakers, consult your owner’s manual for specific wiring instructions. In general, however, you’ll want to connect each surround sound speaker’s positive (red) wire to its corresponding color-coded binding post on the back of your Kenwood receiver.
So if you’re connecting a green surround sound speaker wire to your receiver, look for a green binding post labeled “SR” or “Surround Right.” Once all of your surround sound speakers’ positive wires are connected, repeat this step for their negative (black) wires by attaching them all to the single black binding post labeled “GND” or “Ground.”
4) Finally, plug in your subwoofer and connect its RCA cable(s) into an available input on your Kenwood receiver labelled Subwoofer Pre-Out .
If there is only one RCA cable coming out of your subwoofer’s back panel , then just plug it into either Receiver Input marked Left or Right – it doesn’t matter which one as long as only one cable is plugged into each side .
How to Connect Speaker Wire to Sony Receiver
If you’re looking to connect speaker wire to your Sony receiver, there are a few things you’ll need to do first. First, identify the positive and negative terminals on your receiver. The positive terminal is typically red, while the negative terminal is black.
Once you’ve identified the terminals, twist the corresponding colored wires together and screw on a wire connector. Next, plug in your speakers to the receiver and turn it on. You should now be able to hear sound coming from your speakers!
How to Connect Speakers to Tv With Speaker Wire
If you want to improve your television’s audio output, or if it doesn’t have an audio output at all, you can connect speakers to the TV using speaker wire. It’s a relatively easy process, and all you need is some basic equipment and a little knowledge of how to connect wires. With the right setup, you can have great-sounding TV in no time!
What You Need:
-Speakers (powered or unpowered)
-Speaker wire
-Television
-Wire cutters (if necessary)
Instructions:
1. Decide where you want to place your speakers. Keep in mind that powered speakers will need to be near an outlet.
2. Cut the speaker wire to the desired length, using wire cutters.
3. Connect one end of the speaker wire to the back of the left speaker, and then connect the other end of that same piece of wire to the “left” input on your TV or receiver.
4. Repeat Step 3 for the right speaker.
5.) If your TV only has one input for audio (often labeled “audio out”), connect one end of a second piece of speaker wire here, and then run this Wire To The Right Speaker Input Or Output On Your Receiver Or Amplifier.
“]5.[/caption] If everything is hooked up correctly, you should now be able to hear sound coming from your speakers!
Connecting Speaker Wire to Screw Terminals
If you’re looking to connect your speaker wire to screw terminals, there are a few things you need to know. First, make sure that the gauge of the speaker wire is appropriate for the terminals. Second, strip the insulation off of the wires so that you can twist or solder them together.
Finally, use a continuity tester or multimeter to test for proper connection before connecting your speakers.
When connecting speaker wire to screw terminals, it’s important to use the correct gauge of wire. The thicker the wire, the lower the gauge number.
For example, 16-gauge wire is thicker than 18-gauge wire. Most home theater systems will require 16-gauge or 14-gauge speaker wire.
Once you’ve determined the correct gauge of speaker wire, strip about 3/4″ of insulation off of each end of the wires using a stripping tool or a sharp knife.
Be careful not to cut into the copper conductor inside the insulation. After stripping the insulation, twist or solder the bare copper conductors together and then tighten down on the screw terminal until it’s secure.
Finally, use a continuity tester or multimeter set to “Ohms” modeto test for proper connection between your wires and terminals before connecting your speakers.
If everything checks out, go ahead and connect your speakers!
Connecting Multiple Speakers to an Amplifier
If you’re looking to add some extra oomph to your audio setup, you’ll need to connect multiple speakers to an amplifier. This guide will show you how to do just that, so you can enjoy better sound quality and more immersive audio experiences.
First, you’ll need to determine which type of amplifier you have.
There are two main types: stereo and mono. Stereo amplifiers can power two speakers, while mono amplifiers can power one or more speakers. If you’re not sure which type of amplifier you have, consult the manual or look for markings on the back of the device.
Next, take a look at your speakers. Most home theater systems come with five main speakers: left and right front channels, a center channel, and left and right surround channels. If you’re using powered subwoofers, they’ll also be connected to the amplifier.
In most cases, each speaker will have its own wire (or pair of wires) running from it to the amp. The number of wires will correspond with the number of speaker inputs on your amplifier – so if your amp has four inputs, there will be four sets of wires coming from your speakers (left front, right front, left surround, right surround). If you’re using passive subwoofers (subs that aren’t powered by their own Amp), they’ll usually share an input with another speaker (for example: the left front and left surround might both be connected to Input 1).
Now that everything is hooked up correctly, it’s time to test it out! Fire up your favorite music or movie and see how it sounds through your new system. If everything sounds good then congratulations – you’ve successfully added multiple speakers to your amplifier!
How to Wire Speakers With 4 Terminals
If you’re looking to wire speakers with 4 terminals, there are a few things you’ll need to keep in mind. First, you’ll need to identify which terminal is positive and which is negative. You can do this by using a multimeter or simply looking at the polarity of the speaker terminals themselves.
Once you’ve done that, you’ll need to connect the positive terminal of one speaker to the negative terminal of the other speaker. Finally, you’ll need to connect the remaining two terminals together – one positive and one negative. This will complete the circuit and allow your speakers to function properly.
Keep in mind that it’s important to use speaker wire that is appropriately sized for your application – using too thin of wire can result in an impedance mismatch and cause your speakers to sound poor. With that in mind, follow these steps and you should be able to wire your speakers with 4 terminals without any issues!
Credit: www.youtube.com
How Do You Connect Speaker Wire to the Back of a Receiver?
Assuming you’re talking about connecting passive speakers to a receiver (as opposed to, say, powered speakers), there are a couple of ways to do it. The most common way is to use banana plugs.
Banana plugs have two prongs that fit into the binding posts on the back of the receiver.
The binding posts come in two varieties: spring-loaded and screw-down. Spring-loaded binding posts are the most common type. They’re easy to use – just insert the banana plug into the hole and release the spring-loaded lever – but they don’t provide as secure of a connection as screw-down binding posts.
Screw-down binding posts require you to unscrew them, insert the banana plug, and then screw them back down again. This provides a more secure connection, but can be a little more difficult to do if you’re not used to it.
If your receiver doesn’t have binding posts, or if you want an even more secure connection, you can also use Bare Wire Connectors.
These are basically just metal plates with screws that you attach your speaker wire to. You then screw down the connector onto the corresponding terminal on the back of the receiver.
Whichever method you choose, make sure that you connect positive (+) to positive (+) and negative (-) to negative (-).
If you mix them up, your speakers won’t work properly!
How Do I Connect Speaker Wire to Speaker Wire?
There are a few ways to connect speaker wire to speaker wire. The most common way is to use a banana plug. Banana plugs come in two parts, the male plug and the female jack.
To connect the two wires, you’ll need to strip about 1/2 inch of insulation off of each wire. Once the wires are stripped, twist each one around the corresponding connector on the banana plug. Make sure that the connections are tight so that there is good contact between the wires and the connectors.
Another way to connect speaker wire is by using bare wire connections. To do this, you’ll need to strip about 3/4 inch of insulation off of each wire. Once the wires are stripped, twist each one around the corresponding connector on the binding post.
Make sure that the connections are tight so that there is good contact between the wires and the connectors.
Whichever method you choose, be sure to double check your work before powering on your speakers!
Can You Add Speakers to a Receiver?
It’s possible to add speakers to a receiver, but it depends on the type of receiver you have. If you have an amplifier receiver, then you can simply plug in additional speakers using speaker wire. If your receiver is not an amplifier, then you’ll need to purchase an amplifier in order to power additional speakers.
You can then connect the amplifier to your receiver and plug in your additional speakers. Keep in mind that adding more speakers will require more power, so make sure your receiver or amplifier can handle the extra load.
How Do I Connect Speaker Wire to My Denon Receiver?
Denon is a Japanese electronics company that produces high-quality audio and video products. Their receivers are no exception, and offer a great deal of flexibility when it comes to connecting speakers. In this blog post, we’ll walk you through the process of connecting speaker wire to your Denon receiver.
First, you’ll need to gather your materials. You’ll need speaker wire (of course), as well as banana plugs or bare wire connectors (depending on the type of connections your receiver accepts). You’ll also need a screwdriver and perhaps a pair of pliers.
Once you have everything gathered, take a look at your receiver to determine which ports you’ll be using for your main front left and right speakers. These are typically labeled “L” and “R” or “Left” and “Right.” If you’re not sure which is which, consult your receiver’s manual – it should be very clear.
Now it’s time to start connecting wires! Begin by threading one end of each speaker wire through the appropriate port on the back of the receiver (again, consult your manual if you’re unsure). Once the wire is threaded through, use either banana plugs or bare wire connectors to secure the wire in place.
Make sure these connections are tight – you don’t want any loose wires floating around inside your receiver!
Now repeat this process for all remaining speakers. Once all wires are securely connected, power on your receiver and test out your new setup!
Conclusion
Most people think that the only way to connect speakers to a receiver is with wires. However, there are other ways to do this as well. You can actually use wireless speakers and still get great sound quality.
Here are a few things that you need to know about connecting your speakers wirelessly.
The first thing that you need to do is make sure that your receiver has an aux input. This is how the signal will be sent from the receiver to the speaker.
If your receiver does not have an aux input, then you will not be able to use wireless speakers.
Next, you need to purchase a wireless transmitter and receiver kit. These kits come with everything that you need to set up your system.
Make sure that you get one that is compatible with your type of speaker.
Once you have the kit, all you need to do is plug the transmitter into the aux input on your receiver. Then, take the two wires that come with the kit and connect them from the output on the transmitter to the inputs on your speakers.
After that, just turn on both devices and enjoy your music!